目录:
一. Tensorflow的安装及识别模型的训练
二. 识别api在Flask上的搭建
三. Android端的拍照识别
Tensorflow的安装及识别模型的训练
——基于谷歌Inception-v3模型
项目目录结构
1
2
3
4
5
6
7
8
9
10
11
12
13
14
15
16
17
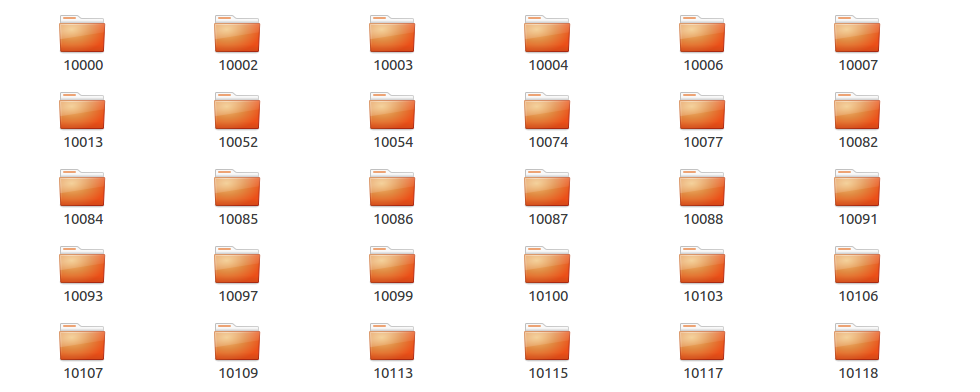
| -training
-training_data //存放训练数据集文件夹
-10000 //label为10000的图片文件夹
-10003
-10004
……
-model // 存放inception-v3模型
-bottleneck // 存放模型瓶颈层的特征结果
-10000 //label为10000的图片文件夹
-10003
-10004
……
-retrain.py //训练程序
-collect_training_data.py //收集样本数据程序
-dictionay.txt //翻译字典文件
-output_graph.pb //生成的模型文件
-output_label.txt // 生成的label文件
|
主要步骤
并生成dictionary.txt,作为识别结果的翻译文件
收集训练数据
主要注意:
- 收集数据时,样本数量在20个以上,否则可能会导致一些错误。
- 以英文或数字的形式作为id来命名文件夹(retrain demo不支持中文)
- 生成id-名称对应的dictionary.txt文件,作为识别结果的翻译文件
collect_training_data.py
1
2
3
4
5
6
7
8
9
10
11
12
13
14
15
16
17
18
19
20
21
22
23
24
25
26
27
28
29
30
31
32
33
34
35
36
37
38
39
40
41
42
43
44
45
46
47
48
49
50
51
52
53
54
55
56
57
58
59
60
61
62
63
64
65
66
67
68
69
70
71
72
| # coding=utf-8
# 收集植物图片
from bs4 import BeautifulSoup
import requests
import os
import random
sess = requests.session()
refer = 'http://www.plantphoto.cn/sp/'
get_pic = 'http://www.plantphoto.cn/ashx/getphotopage.ashx'
data_path = 'training_data/'
def save_imgs(url, path):
header = {
"Accept": "text/html,application/xhtml+xml,application/xml;q=0.9,image/webp,*/*;q=0.8",
"Connection": "keep-alive",
"Host": "img.plantphoto.cn",
"Referer": refer + path,
"User-Agent": "Mozilla/5.0 (X11; Linux x86_64) AppleWebKit/537.36 (KHTML, like Gecko) Chrome/58.0.3029.81 "
"Safari/537.36",
}
local_filename = url.split('/')[-1]
print("Download Image File=", local_filename)
try:
r = requests.get(url, headers=header, stream=True) # here we need to set stream = True parameter
with open(data_path + path + '/' + local_filename, 'wb') as f:
for chunk in r.iter_content(chunk_size=1024):
if chunk: # filter out keep-alive new chunks
f.write(chunk)
f.flush()
f.close()
except:
print(u'保存图片失败')
if __name__ == '__main__':
file = open('dictionary.txt', 'w')
for time in range(200): # 循环收集200次
i = str(random.randint(10000, 99999)) # 生成随机植物cid
a = range(1, 3) # 收集两页数据
name = ''
for page in reversed(a):
new_url = get_pic + '?page=' + str(page) + '&n=2&group=sp&cid=' + i
header = {
'Accept': 'text/html,application/xhtml+xml,application/xml;q=0.9,image/webp,*/*;q=0.8',
'Accept-Encoding': 'gzip, deflate, sdch',
'Accept-Language': 'zh-CN,zh;q=0.8,zh-TW;q=0.6',
'Connection': 'keep-alive',
'Host': 'www.plantphoto.cn',
'Cookie': 'AJSTAT_ok_pages=1; AJSTAT_ok_times=4; '
'__tins__2318434=%7B%22sid%22%3A%201512994067786%2C%20%22vd%22%3A%201%2C%20%22expires%22%3A'
'%201512995867786%7D; __51cke__=; __51laig__=4',
'Cache-Control': 'max-age=0',
'Upgrade-Insecure-Requests': '1',
'User-Agent': 'Mozilla/5.0 (X11; Linux x86_64) AppleWebKit/537.36 (KHTML, like Gecko) '
'Chrome/58.0.3029.81 Safari/537.36 '
}
response = requests.get(new_url, headers=header).content
soup = BeautifulSoup(response, 'lxml')
imgs = soup.find_all('img')
if imgs.__len__() > 10: # 确保样本数量不小于20
path = data_path + i
name = imgs[0]['alt'].encode('utf-8')
if not os.path.exists(path):
os.mkdir(path)
for j in imgs:
save_imgs(j['src'], i)
else:
# 第二页图片数量不足10张
break
file.write(i + ',' + name + '\n')
file.close()
|

Tensorflow在Ubuntu16.04上的安装
使用pip安装cpu版本tensorflow
1
| sudo pip install --upgrade https://ci.tensorflow.org/view/tf-nightly/job/tf-nightly-linux/TF_BUILD_IS_OPT=OPT,TF_BUILD_IS_PIP=PIP,TF_BUILD_PYTHON_VERSION=PYTHON2,label=cpu-slave/lastSuccessfulBuild/artifact/pip_test/whl/tf_nightly-1.head-cp27-none-linux_x86_64.whl
|
tensorflow最新版本地址可在此查看
tensorflow
测试tensorflow是否安装成功:
1
2
3
4
5
6
7
| $ python
>>> import tensorflow as tf
>>> hello = tf.constant('Hello, TensorFlow!')
>>> sess = tf.Session()
>>> print sess.run(hello)
Hello, TensorFlow!
|
安装pillow(图像处理库,用于对识别图像的旋转等操作)
sudo pip install pillow
安装numpy(一种开源的数值计算扩展,这里用于计算图像旋转数据)
sudo pip install numpy
安装opencv(著名图像处理视觉库,这里用于对识别图像的模糊和旋转处理)
sudo pip install opencv
开始训练
下载tensorflow retrain
demo中的retrain.py到项目根目录中,下载地址
打开终端,输入以下命令即进入训练过程
1
| $ python ./retrain.py --bottleneck_dir bottleneck --how_many_training_steps 4000 --model_dir model --output_graph output_graph.pb --output_labels output_labels.txt --image_dir training_data/
|
可选参数:
使用时在参数名称前加”- -“,如”- -output_graph”
| 参数名 |
值类型 |
默认值 |
说明 |
| image_dir |
str |
|
训练数据集所在的目录 |
| output_graph |
str |
/tmp/output_graph.pb |
训练生成的模型保存位置 |
| output_labels |
str |
/tmp/output_labels.txt |
训练生成的标签保存位置,本例为output_labels.txt |
| summaries_dir |
str |
/tmp/retrain_logs |
TensorBoard的日志摘要的保存位置 |
| how_many_training_steps |
int |
4000 |
训练步数 |
| learning_rate |
float |
0.01 |
学习率 |
| testing_percentage |
int |
10 |
测试集的百分比 |
| validation_percentage |
int |
10 |
验证集的百分比 |
| eval_step_interval |
int |
10 |
训练结果评估的时间间隔 |
| train_batch_size |
int |
100 |
一次训练的图像的数量 |
| validation_batch_size |
int |
100 |
一次验证图像数量 |
| print_misclassified_test_images |
bool |
False |
打印输出所有错误分类的测试图像列表 |
| model_dir |
str |
/tmp/imagenet |
存放inception-v3模型 |
| bottleneck_dir |
str |
/tmp/bottleneck |
缓存的瓶颈层值的文件路径 |
| final_tensor_name |
str |
final_result |
重新训练的图像中输出的分类层名字,将会在get_tensor_by_name时使用 |
| flip_left_right |
bool |
False |
是否随机水平翻转训练图像的一半 |
| random_crop |
int |
0 |
随机裁剪训练图像的百分比 |
| random_scale |
int |
0 |
随机缩放训练图像的百分比 |
| random_brightness |
int |
0 |
随机调整亮度 |
| architecture |
str |
inception_v3 |
图像分类模型,默认为inception-v3,inception-v3是使用最多的图像模型,但也是最慢的 |
开始训练后,会自动下载一个inception-2015-12-05.tgz的文件,约88MB
本例训练样本为植物,共有12种,共计472个图像数据,训练过程所用时间约为20分钟
最终训练结果: Final test accuracy = 72.7% (N=55)
训练完成后,项目根目录会生成output_labels.txt与ouput_graph.pb
测试:
test.py
1
2
3
4
5
6
7
8
9
10
11
12
13
14
15
16
17
18
19
20
21
22
23
24
25
26
27
28
29
30
31
32
33
34
35
36
37
38
39
40
41
42
43
44
45
46
47
48
49
50
51
52
53
54
55
56
57
58
59
60
61
62
63
64
65
66
67
68
69
70
71
72
73
74
75
76
77
78
79
80
81
82
83
84
85
86
87
88
89
90
91
92
93
94
95
96
97
98
99
100
101
102
103
104
105
106
107
108
109
110
111
112
113
114
115
116
| #coding=utf-8
import cv2
import math
import numpy as np
from PIL import Image
from PIL.ExifTags import TAGS
import tensorflow as tf
# 加载dictionary.txt
dictionary = {}
ftotal = open('./dictionary.txt', 'r')
line = ftotal.readline()
while line:
totaltree = line.replace('\r\n', '').replace('\n', '').split(',')
dictionary[totaltree[0]] = totaltree[1].decode("utf-8")
line = ftotal.readline()
ftotal.close()
# 加载识别标签
labels = []
for label in tf.gfile.GFile("output_labels.txt"):
labels.append(label.rstrip())
# 加载Graph
with tf.gfile.FastGFile("output_graph.pb", 'rb') as f:
graph_def = tf.GraphDef()
graph_def.ParseFromString(f.read())
tf.import_graph_def(graph_def, name='')
sess = tf.Session()
softmax_tensor = sess.graph.get_tensor_by_name('final_result:0')
# 植物识别,返回识别结果字符串
def plantRecognition(plantFile):
# 打开植物图片进行识别
image = tf.gfile.FastGFile(plantFile, 'rb').read()
predict = sess.run(softmax_tensor, {'DecodeJpeg/contents:0': image})
# 根据分类概率进行排序
top = predict[0].argsort()[-len(predict[0]):][::-1]
result = ''
count = 8
for index in top:
human_string = dictionary[labels[index]]
score = predict[0][index]
# 识别率低于0.01即跳出
if score < 0.0099:
break
# 拼写识别结果
temp = human_string + ':' + '%(p).2f'%{'p':score * 100} + '%'
result += temp + '\n'
count -= 1
if count == 0:
break
print(result)
return result
# 图片按中心点旋转
def rotate_about_center(src, angle, scale=1.):
if angle == 0:
return src
w = src.shape[1]
h = src.shape[0]
rangle = np.deg2rad(angle) # angle in radians
# now calculate new image width and height
nw = (abs(np.sin(rangle)*h) + abs(np.cos(rangle)*w))*scale
nh = (abs(np.cos(rangle)*h) + abs(np.sin(rangle)*w))*scale
# ask OpenCV for the rotation matrix
rot_mat = cv2.getRotationMatrix2D((nw*0.5, nh*0.5), angle, scale)
# calculate the move from the old center to the new center combined
# with the rotation
rot_move = np.dot(rot_mat, np.array([(nw-w)*0.5, (nh-h)*0.5,0]))
# the move only affects the translation, so update the translation
# part of the transform
rot_mat[0,2] += rot_move[0]
rot_mat[1,2] += rot_move[1]
return cv2.warpAffine(src, rot_mat, (int(math.ceil(nw)), int(math.ceil(nh))), flags=cv2.INTER_LANCZOS4)
# 对图像进行模糊处理,提高识别率
def GaussianBlur(imagefile):
rotateangle = get_Rotate_Angle(imagefile)
img = cv2.imread(imagefile)
kernel_size = (5, 5)
sigma = 3
newimg = cv2.GaussianBlur(img, kernel_size, sigma)
res = rotate_about_center(newimg, rotateangle)
cv2.imwrite(imagefile, res);
# 获取图片旋转角度
def get_Rotate_Angle(fname):
try:
img = Image.open(fname)
if hasattr(img, '_getexif'):
exifinfo = img._getexif()
if exifinfo != None:
for tag, value in exifinfo.items():
decoded = TAGS.get(tag, tag)
if decoded == 'Orientation':
if value == 6:
return 270
else:
return 0
except IOError:
print 'IOError'
return 0
if __name__ == '__main__':
plantRecognition('测试图片路径')
|
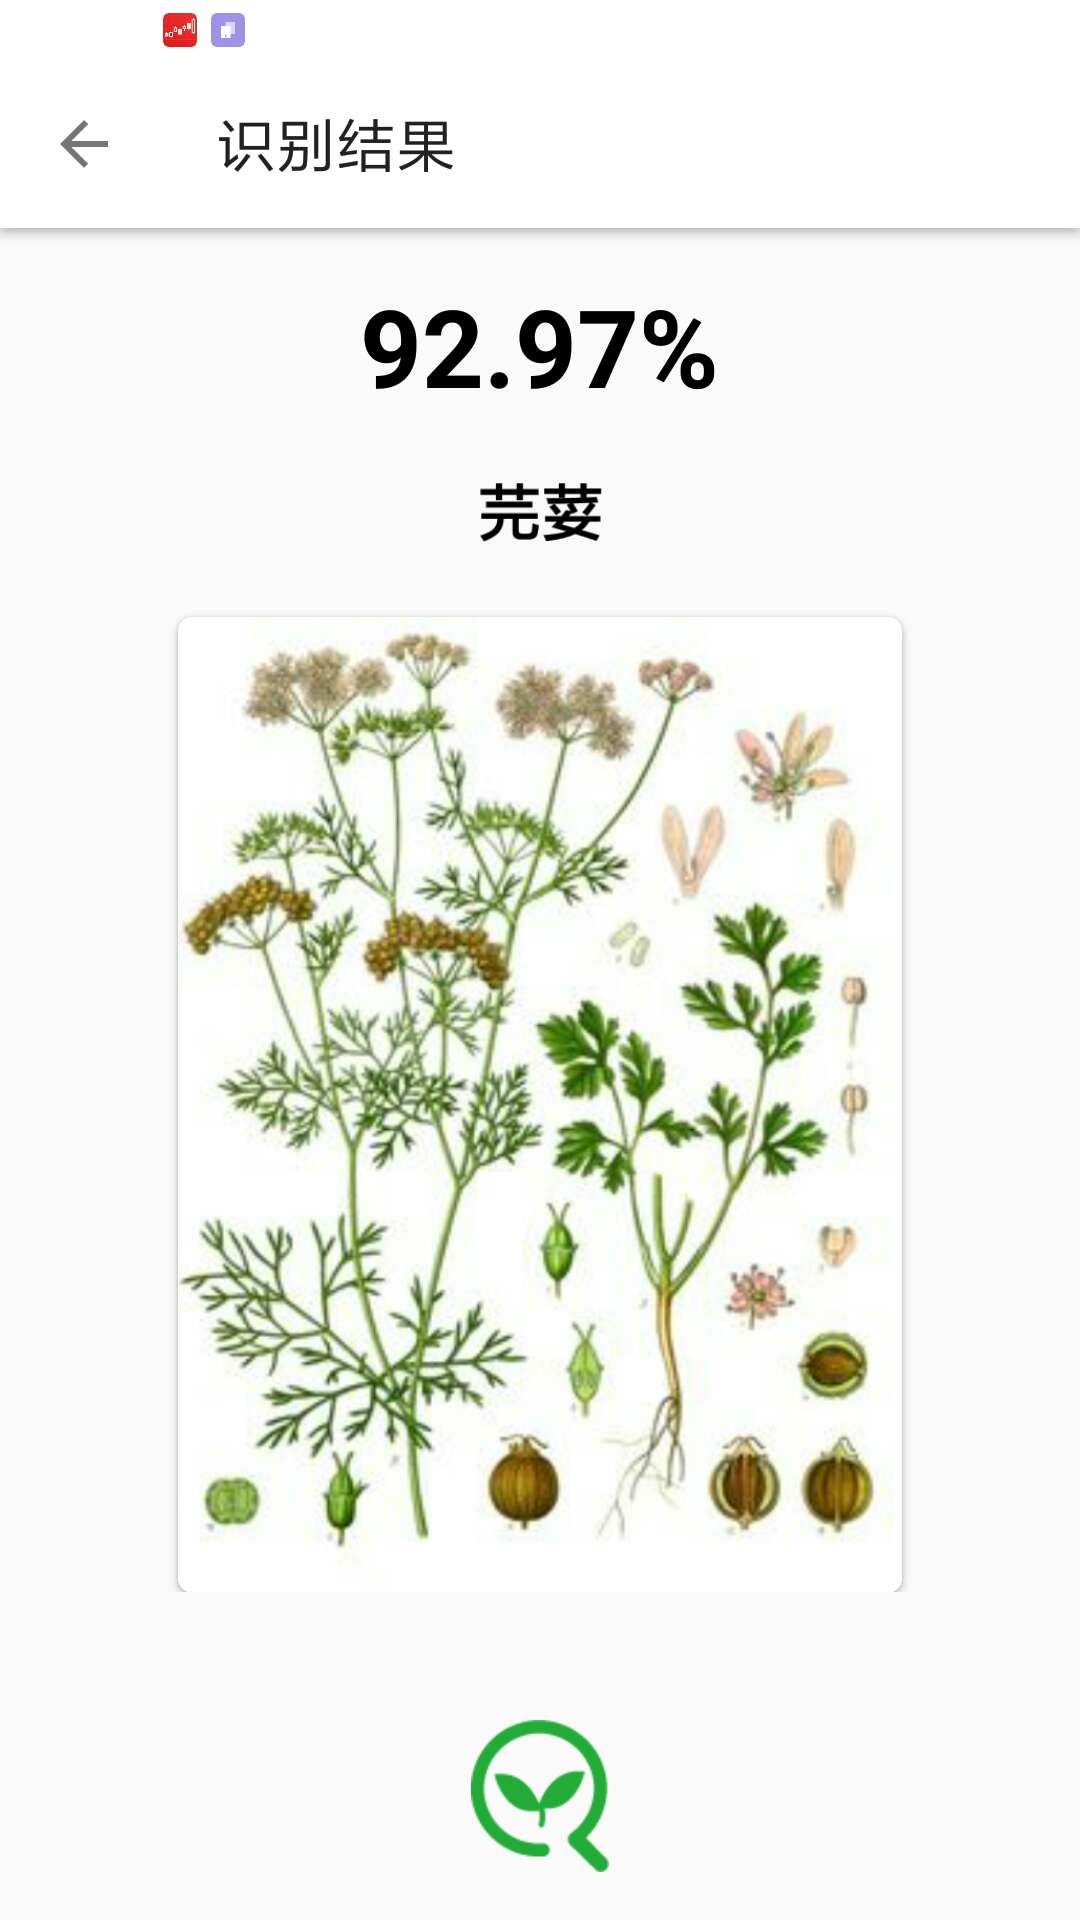
测试图片:
测试结果:
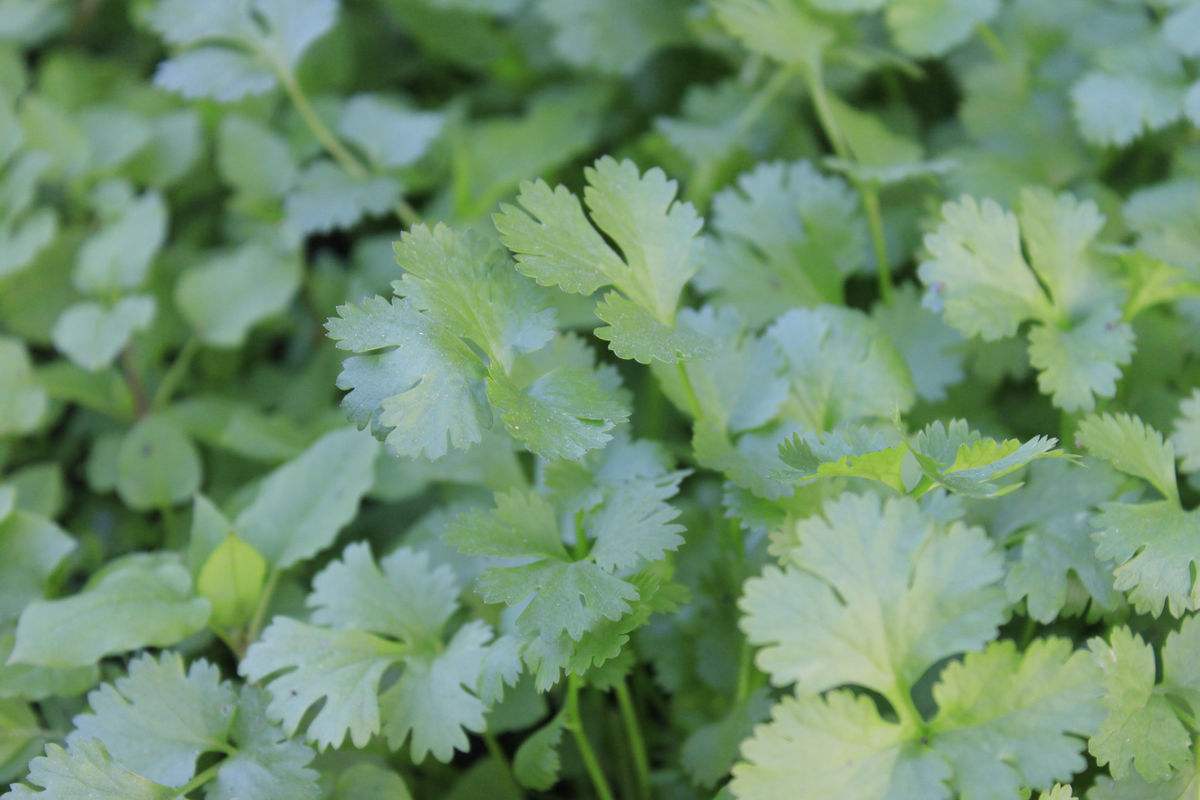
芫荽:52.84%
裂叶铁线莲:26.60%
日本蓝盆花:11.06%
菱叶崖爬藤:4.37%
麒麟掌:2.93%
九味一枝蒿:1.34%
识别api在Flask上的搭建
服务器: Ubuntu 16.04 64位
准备工作
首先安装项目所需的组件:pip,dev,nginx。python2下安装
1
2
3
| sudo apt-get update
sudo apt-get install python-pip python-dev nginx
|
python3
1
2
| sudo apt-get update
sudo apt-get install python3-pip python3-dev nginx
|
安装python虚拟环境
virtualenv 是一个创建隔绝的Python环境的工具。virtualenv创建一个包含所有必要的可执行文件的文件夹,用来使用Python工程所需的包。
同样,python2下是
1
| sudo pip install virtualenv
|
python3
1
| sudo pip3 install virtualenv
|
在/home目录下创建项目
1
2
3
| cd /home
mkdir tensorflow
cd tensorflow
|
在tensorflow下创建虚拟环境tensorflowenv
1
| virtualenv tensorflowenv
|
进入虚拟环境
1
| source tensorflowenv/bin/activate
|
此时出现 (tensorflowenv) root@:/home/tensorflow#表明已进入虚拟环境
配置Flask应用
安装 Flask and uWSGI
创建一个Hello world
1
| nano ~/tensorflow/tensorflow.py
|
tensorflow.py
1
2
3
4
5
6
7
8
9
| from flask import Flask
app = Flask(__name__)
@app.route("/")
def hello():
return "<h1 style='color:blue'>Hello World!</h1>"
if __name__ == "__main__":
app.run(host='0.0.0.0')
|
配置WSGI
创建一个wsgi.py
1
| nano ~/tensorflow/wsgi.py
|
1
2
3
4
| from tensorflow import app
if __name__ == "__main__":
app.run()
|
退出虚拟环境
创建uWSGI配置文件tensorflow.ini
1
| nano ~/tensorflow/tensorflow.ini
|
1
2
3
4
5
6
7
8
9
10
11
12
| [uwsgi]
module = wsgi:app
daemonize = /var/log/uwsgi.log
master = true
processes = 5
socket = tensorflow.sock
chmod-socket = 666
vacuum = true
die-on-term = true
|
配置systemd
创建tensorflow.service
1
| sudo nano /etc/systemd/system/tensorflow.service
|
1
2
3
4
5
6
7
8
9
10
11
12
13
| [Unit]
Description=uWSGI instance to serve tensorflow
After=network.target
[Service]
User=root
Group=www-data
WorkingDirectory=/home/tensorflow
Environment="PATH=/home/tensorflow/tensorflowenv/bin"
ExecStart=/home/tensorflow/tensorflowenv/bin/uwsgi --ini tensorflow.ini
[Install]
WantedBy=multi-user.target
|
现在可以启动uWSGI服务
1
2
| sudo systemctl start tensorflow
sudo systemctl enable tensorflow
|
配置Nginx代理
1
| sudo nano /etc/nginx/sites-available/tensorflow
|
1
2
3
4
5
6
7
8
9
| server {
listen 80;
server_name 服务器IP;
location / {
include uwsgi_params;
uwsgi_pass unix:/home/tensorflow/tensorflow.sock;
}
}
|
开启创建的Nginx服务
1
| sudo ln -s /etc/nginx/sites-available/tensorflow /etc/nginx/sites-enabled
|
检查Nginx配置是否有错误
重启Nginx
1
| sudo systemctl restart nginx
|
1
| sudo ufw allow 'Nginx Full'
|
测试Flask是否部署成功
访问http://server_domain_or_IP 查看是否部署成功
安装tensorflow,numpy,pillow,opencv
安装步骤详情见1.1.2.2
Tensorflow在Ubuntu16.04上的安装
注意,由于flask是在安装在虚拟环境下,因此这里的TensorFlow也必须安装在虚拟环境下
进入虚拟环境:
1
| source tensorflowenv/bin/activate
|
tensorflow在虚拟环境下的安装需要加–ignore-installed参数,否则在识别时可能会提示no module named TensorFlow错误
示例:
1
| sudo pip install --ignore-installed --upgrade https://ci.tensorflow.org/view/tf-nightly/job/tf-nightly-linux/TF_BUILD_IS_OPT=OPT,TF_BUILD_IS_PIP=PIP,TF_BUILD_PYTHON_VERSION=PYTHON2,label=cpu-slave/lastSuccessfulBuild/artifact/pip_test/whl/tf_nightly-1.head-cp27-none-linux_x86_64.whl
|
上传模型
上传训练生成的dictionary.txt 、 output_labels.txt 、 output_graph.pb
三个文件到~/tensorflow/中
编写flask主程序tensorflow.py
tensorflow.py
1
2
3
4
5
6
7
8
9
10
11
12
13
14
15
16
17
18
19
20
21
22
23
24
25
26
27
28
29
30
31
32
33
34
35
36
37
38
39
40
41
42
43
44
45
46
47
48
49
50
51
52
53
54
55
56
57
58
59
60
61
62
63
64
65
66
67
68
69
70
71
72
73
74
75
76
77
78
79
80
81
82
83
84
85
86
87
88
89
90
91
92
93
94
95
96
97
98
99
100
101
102
103
104
105
106
107
108
109
110
111
112
113
114
115
116
117
118
119
120
121
122
123
124
125
126
127
128
129
130
131
132
133
134
135
136
137
138
139
140
141
142
143
144
145
146
147
148
149
150
| #coding=utf-8
import sys
import os
default_encoding = 'utf-8'
if sys.getdefaultencoding() != default_encoding:
reload(sys)
sys.setdefaultencoding(default_encoding)
import cv2
import math
import numpy as np
from PIL import Image
from PIL.ExifTags import TAGS
import tensorflow as tf
from flask import Flask, request, jsonify
app = Flask(__name__)
#加载识别标签翻译字典
dictionary = {}
ftotal = open('./dictionarys.txt', 'r')
line = ftotal.readline()
while line:
totaltree = line.replace('\r\n', '').replace('\n', '').split(',')
dictionary[totaltree[0]] = totaltree[1].decode("utf-8")
line = ftotal.readline()
ftotal.close()
#加载识别标签
labels = []
for label in tf.gfile.GFile("output_labels.txt"):
labels.append(label.rstrip())
# 加载Graph
with tf.gfile.FastGFile("output_graph.pb", 'rb') as f:
graph_def = tf.GraphDef()
graph_def.ParseFromString(f.read())
tf.import_graph_def(graph_def, name='')
@app.route('/upload', methods=['GET', 'POST'])
def upload():
if request.method == 'POST':
file = request.files['file']
#构建图片文件存储路径
photofile = '/home/plant/uploadPhoto/' + file.filename
#保存图片文件
file.save(photofile)
GaussianBlur(photofile)
return plantRecognition(photofile)
#返回植物图片识别结果
#植物识别,返回识别结果字符串
def plantRecognition(plantFile):
sess = tf.Session()
softmax_tensor = sess.graph.get_tensor_by_name('final_result:0')
#打开植物图片进行识别
image = tf.gfile.FastGFile(plantFile, 'rb').read()
predict = sess.run(softmax_tensor, {'DecodeJpeg/contents:0': image})
#根据分类概率进行排序
top = predict[0].argsort()[-len(predict[0]):][::-1]
if os.path.exists(plantFile):
os.remove(plantFile)
# 识别后移除文件,节省服务器存储空间
result = []
item = {}
count = 8
for index in top:
human_string = dictionary[labels[index]].decode("utf-8")
score = predict[0][index]
#识别率低于0.01即跳出
if score < 0.0099:
break
item['name'] = human_string.decode("utf-8")
item['possibility'] = '%(p).2f'%{'p':score * 100} + '%'
result.append(item)
item = {}
#只返回识别前8个结果
count -= 1
if count == 0:
break
# 返回json化的识别数据
return jsonify({'data':result})
#图片按中心点旋转
def rotate_about_center(src, angle, scale=1.):
if angle == 0:
return src
w = src.shape[1]
h = src.shape[0]
rangle = np.deg2rad(angle) # angle in radians
# now calculate new image width and height
nw = (abs(np.sin(rangle)*h) + abs(np.cos(rangle)*w))*scale
nh = (abs(np.cos(rangle)*h) + abs(np.sin(rangle)*w))*scale
# ask OpenCV for the rotation matrix
rot_mat = cv2.getRotationMatrix2D((nw*0.5, nh*0.5), angle, scale)
# calculate the move from the old center to the new center combined
# with the rotation
rot_move = np.dot(rot_mat, np.array([(nw-w)*0.5, (nh-h)*0.5,0]))
# the move only affects the translation, so update the translation
# part of the transform
rot_mat[0,2] += rot_move[0]
rot_mat[1,2] += rot_move[1]
return cv2.warpAffine(src, rot_mat, (int(math.ceil(nw)), int(math.ceil(nh))), flags=cv2.INTER_LANCZOS4)
#图片高斯模糊处理
def GaussianBlur(imagefile):
rotateangle = get_Rotate_Angle(imagefile)
img = cv2.imread(imagefile)
kernel_size = (5, 5)
sigma = 3
newimg = cv2.GaussianBlur(img, kernel_size, sigma)
res = rotate_about_center(newimg, rotateangle)
cv2.imwrite(imagefile, res);
#获取图片旋转角度
def get_Rotate_Angle(fname):
try:
img = Image.open(fname)
if hasattr(img, '_getexif'):
exifinfo = img._getexif()
if exifinfo != None:
for tag, value in exifinfo.items():
decoded = TAGS.get(tag, tag)
if decoded == 'Orientation':
if value == 6:
return 270
else:
return 0
except IOError:
print 'IOERROR ' + fname
return 0
if __name__ == '__main__':
app.run(host='0.0.0.0', port=80)
|
api测试结果
1
2
3
4
5
6
7
8
9
10
11
12
13
14
15
16
17
18
19
20
21
22
23
24
25
26
27
28
| {
"data": [
{
"name": "\u82ab\u837d",
"possibility": "52.84%"
},
{
"name": "\u88c2\u53f6\u94c1\u7ebf\u83b2",
"possibility": "26.60%"
},
{
"name": "\u65e5\u672c\u84dd\u76c6\u82b1",
"possibility": "11.06%"
},
{
"name": "\u83f1\u53f6\u5d16\u722c\u85e4",
"possibility": "4.37%"
},
{
"name": "\u9e92\u9e9f\u638c",
"possibility": "2.93%"
},
{
"name": "\u4e5d\u5473\u4e00\u679d\u84bf",
"possibility": "1.34%"
}
]
}
|
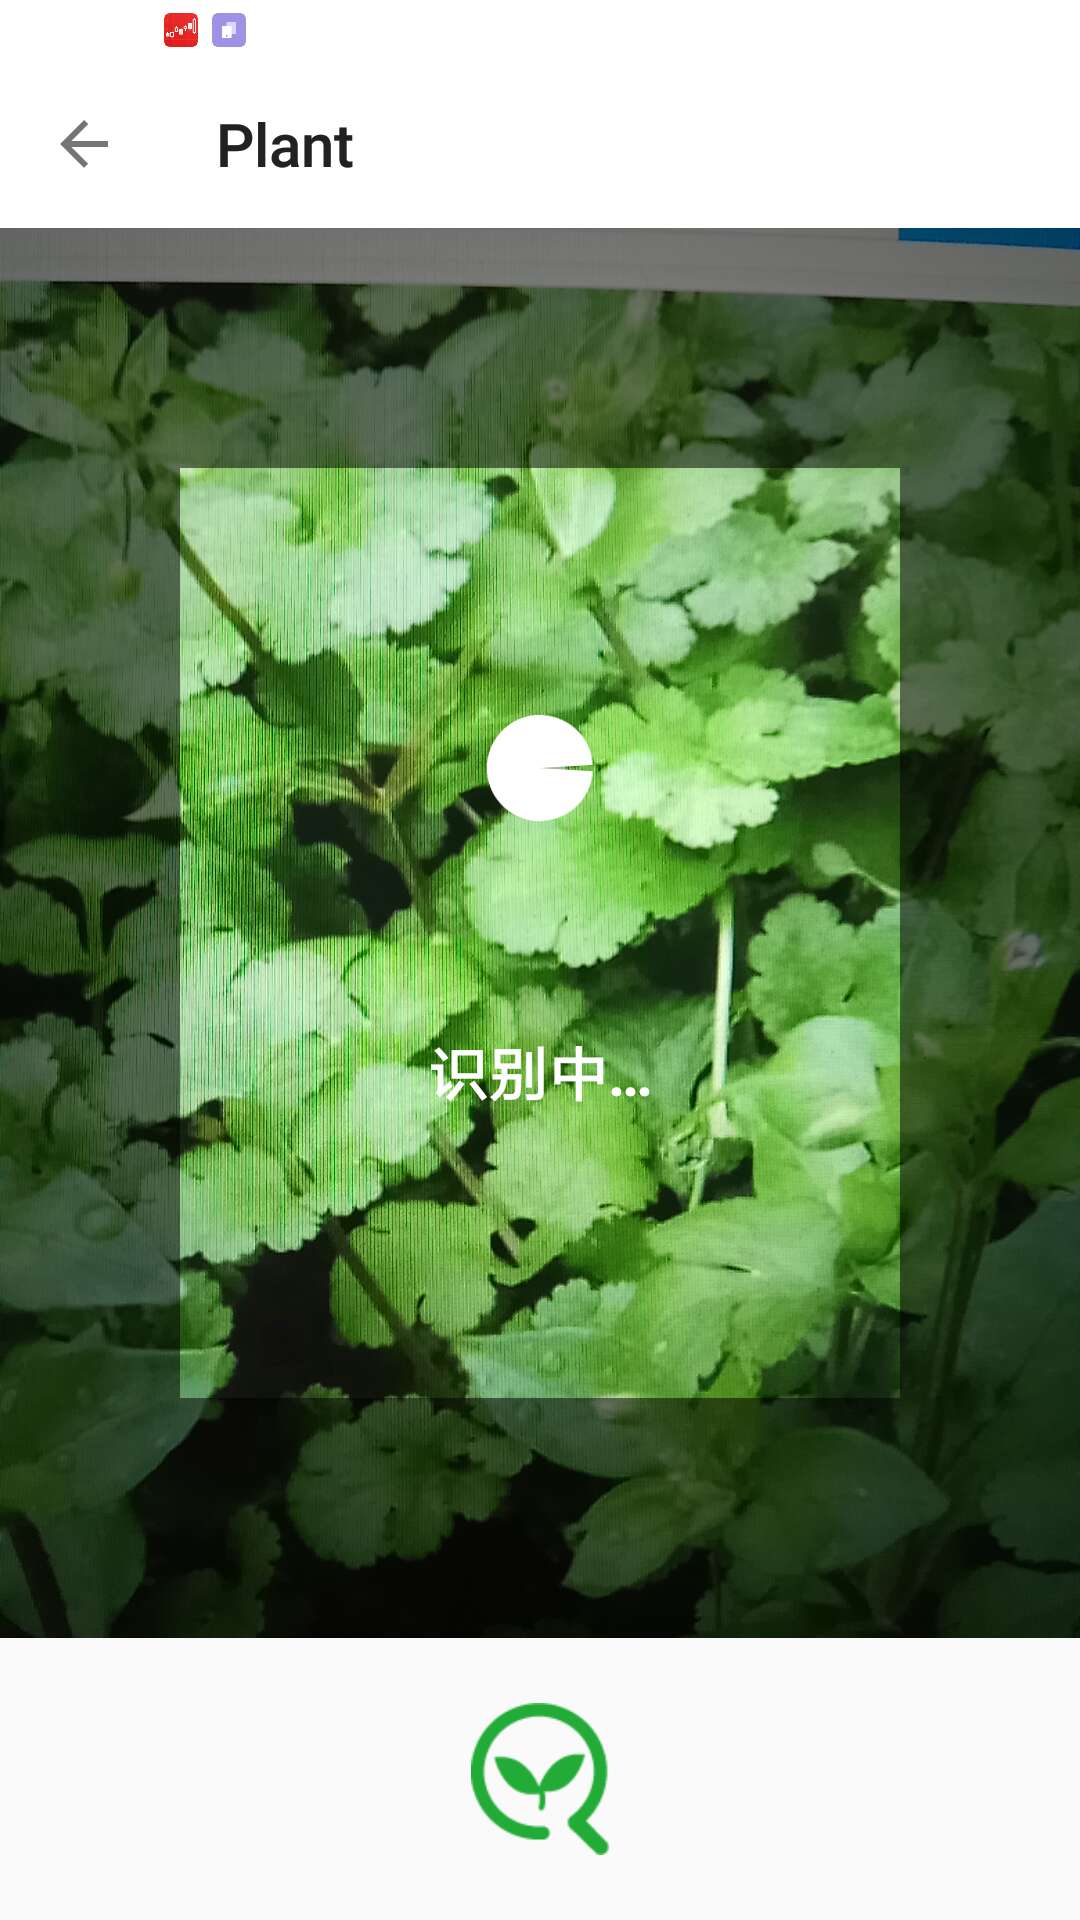
Android端的拍照识别
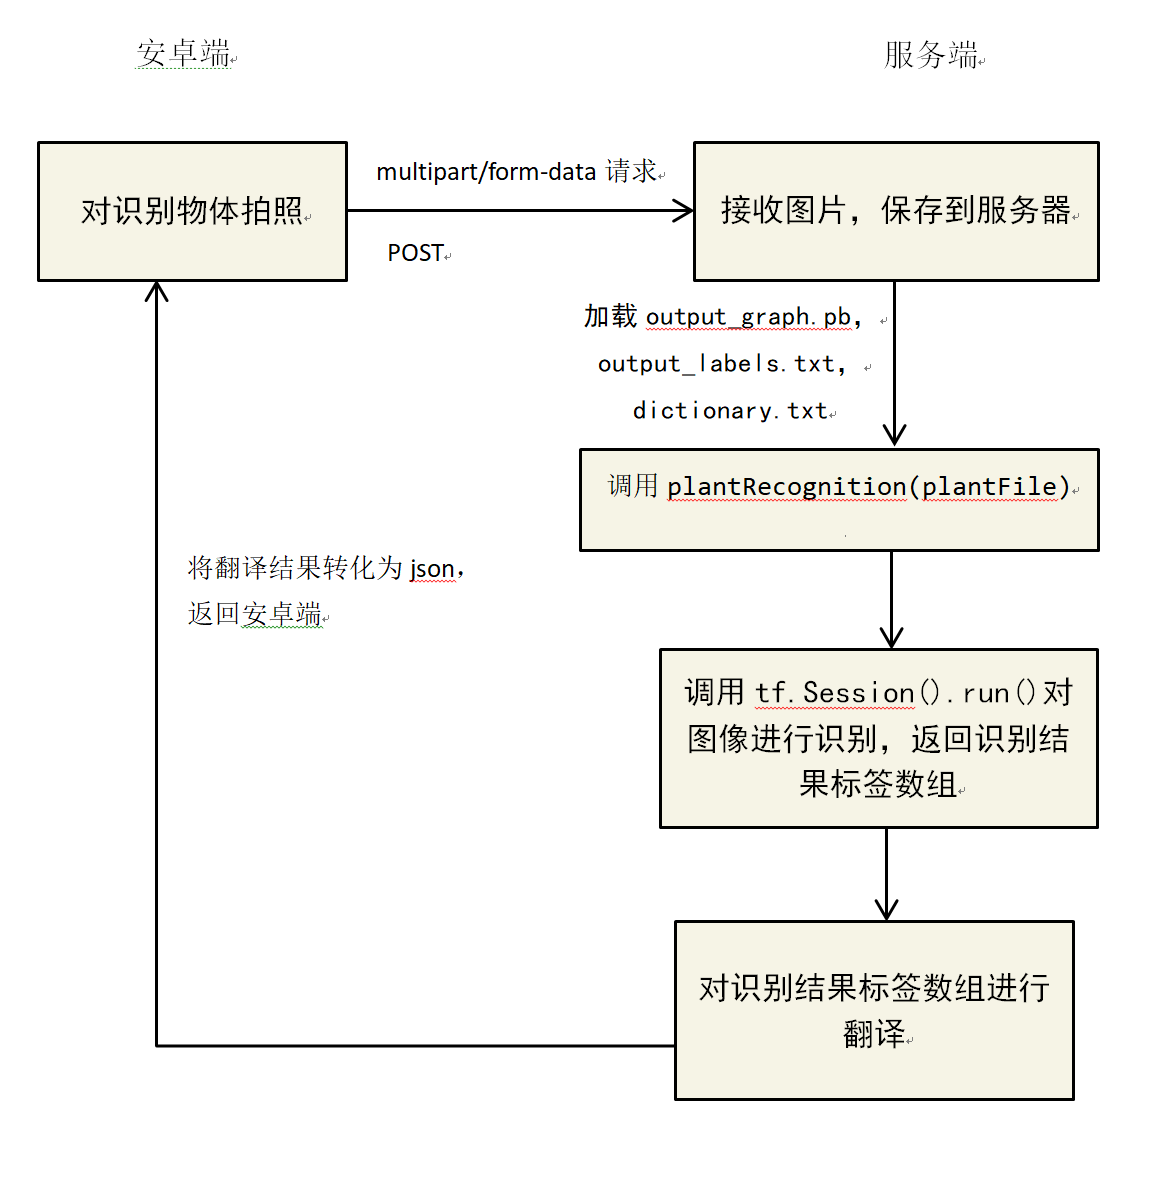
拍照
android拍照的第三方库十分多,好用的也不少,这里用的是natario1的CameraView CameraView地址
这里使用了retrofit+rxJava作网络请求
CameraView提供了一个cameraListener监听拍照点击行为
1
2
3
4
5
6
7
8
9
10
11
12
13
14
15
16
17
18
19
20
21
22
23
24
25
26
27
28
29
30
31
32
33
34
|
cameraView.addCameraListener(new CameraListener() {
@Override
public void onPictureTaken(byte[] picture) {
CameraUtils.decodeBitmap(picture, new CameraUtils.BitmapCallback() {
@Override
public void onBitmapReady(Bitmap bitmap) {
File file = new File(saveBitmapToLocalDir(bitmap));
RequestBody requestBody = RequestBody.create(MediaType.parse("multipart/form-data"),file);
MultipartBody.Part body = MultipartBody.Part.createFormData("file",file.getName(),requestBody);
PlantApplication plantApplication = PlantApplication.create(context);
PlantService plantService = plantApplication.getPlantService();
Disposable disposable = plantService.recognition(PlantFactory.UPLOAD_PLANT_PIC,body)
.observeOn(AndroidSchedulers.mainThread())
.subscribeOn(plantApplication.subscribeScheduler())
.subscribe(new Consumer<RecognitionResponse>() {
@Override
public void accept(RecognitionResponse recognitionResponse) throws Exception {
List<RecognitionResult> resultList = recognitionResponse.getList();
......
}
}, new Consumer<Throwable>() {
@Override
public void accept(Throwable throwable) throws Exception {
Toast.makeText(context,throwable.toString(),Toast.LENGTH_LONG).show();
}
});
compositeDisposable.add(disposable);
}
});
}
});
|
PlantApplication.java
1
2
3
4
5
6
7
8
9
10
11
12
13
14
15
16
17
18
19
20
21
22
23
24
25
26
27
28
29
30
31
32
33
34
35
36
37
38
39
40
41
42
43
44
45
46
47
48
49
50
51
52
53
54
55
56
57
58
59
| import android.app.Application;
import android.content.Context;
import com.mikepenz.iconics.Iconics;
import com.treecute.plant.data.GoodsFactory;
import com.treecute.plant.data.GoodsService;
import com.treecute.plant.data.PlantFactory;
import com.treecute.plant.data.PlantService;
import com.treecute.plant.data.UserFactory;
import com.treecute.plant.data.UserService;
import io.reactivex.Scheduler;
import io.reactivex.schedulers.Schedulers;
public class PlantApplication extends Application {
private PlantService plantService;
private Scheduler scheduler;
@Override
public void onCreate() {
super.onCreate();
}
private static PlantApplication get(Context context){
return (PlantApplication) context.getApplicationContext();
}
public static PlantApplication create(Context context){
return PlantApplication.get(context);
}
public PlantService getPlantService(){
if (plantService==null){
plantService = PlantFactory.create();
}
return plantService;
}
public Scheduler subscribeScheduler(){
if (scheduler==null){
scheduler = Schedulers.io();
}
return scheduler;
}
public void setPlantService(PlantService plantService) {
this.plantService = plantService;
}
public void setScheduler(Scheduler scheduler) {
this.scheduler = scheduler;
}
}
|
PlantService
1
2
3
4
5
6
7
8
|
public interface PlantService {
@Multipart @POST Observable<RecognitionResponse> recognition(@Url String url, @Part MultipartBody.Part file);
}
|
PlantFactory
1
2
3
4
5
6
7
8
9
10
11
12
13
14
15
16
17
18
|
public class PlantFactory {
    public final static String BASE_URL = "http://120.25.1.26:97/";

    public final static String UPLOAD_PLANT_PIC = "http://120.25.1.26/upload";

    public static PlantService create(){
        Retrofit retrofit = new Retrofit.Builder()
                .baseUrl(BASE_URL)
                .addConverterFactory(GsonConverterFactory.create())
                .addCallAdapterFactory(RxJava2CallAdapterFactory.create())
                .build();
        return retrofit.create(PlantService.class);
    }

}
|
最终效果: